0

Soothe Irritated Skin with Greek Yogurt & Honey

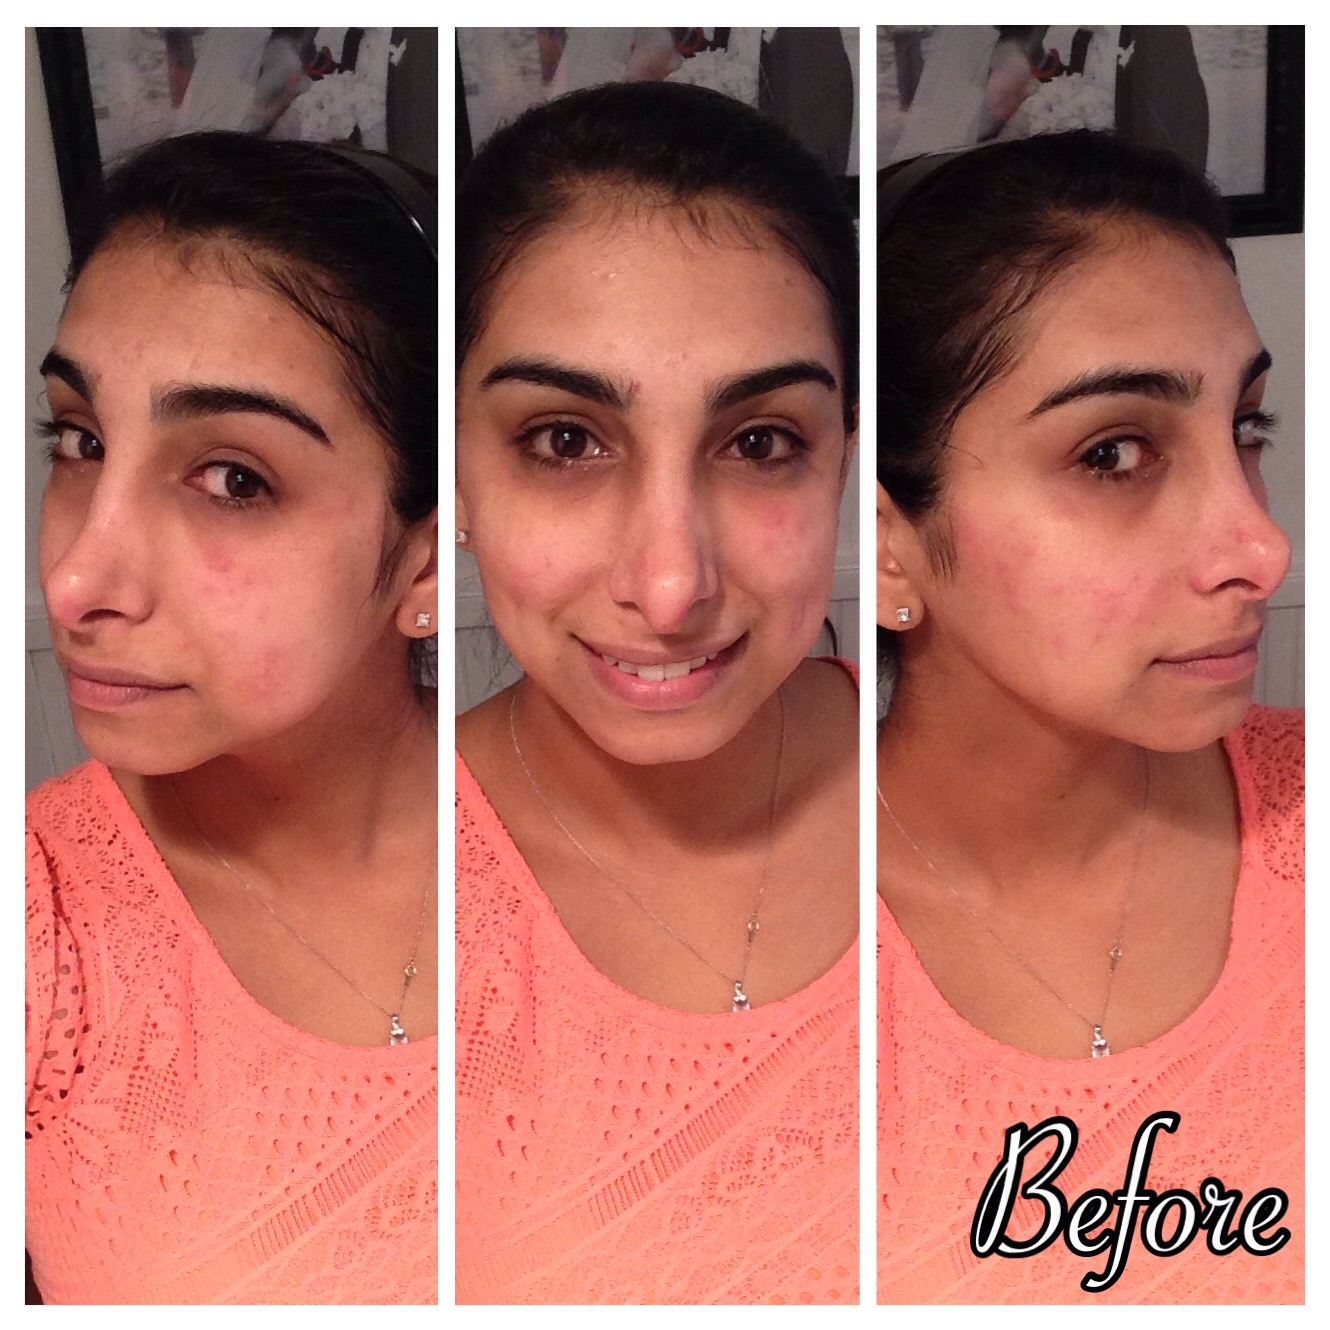
My skin is sensitive and is easily irritated by waxing. After getting waxed, my face often develops a few red, itchy irritation bumps that go away by the end of the day. Lately, however, my skin is even more irritable than usual. Instead of a few bumps, my face now becomes covered with irritation bumps. And instead of staying put for a day or two, they now stuck around for weeks at a time! 


After much Googling, I decided to try a homemade Greek yogurt and honey mask to soothe my red, irritated skin. 
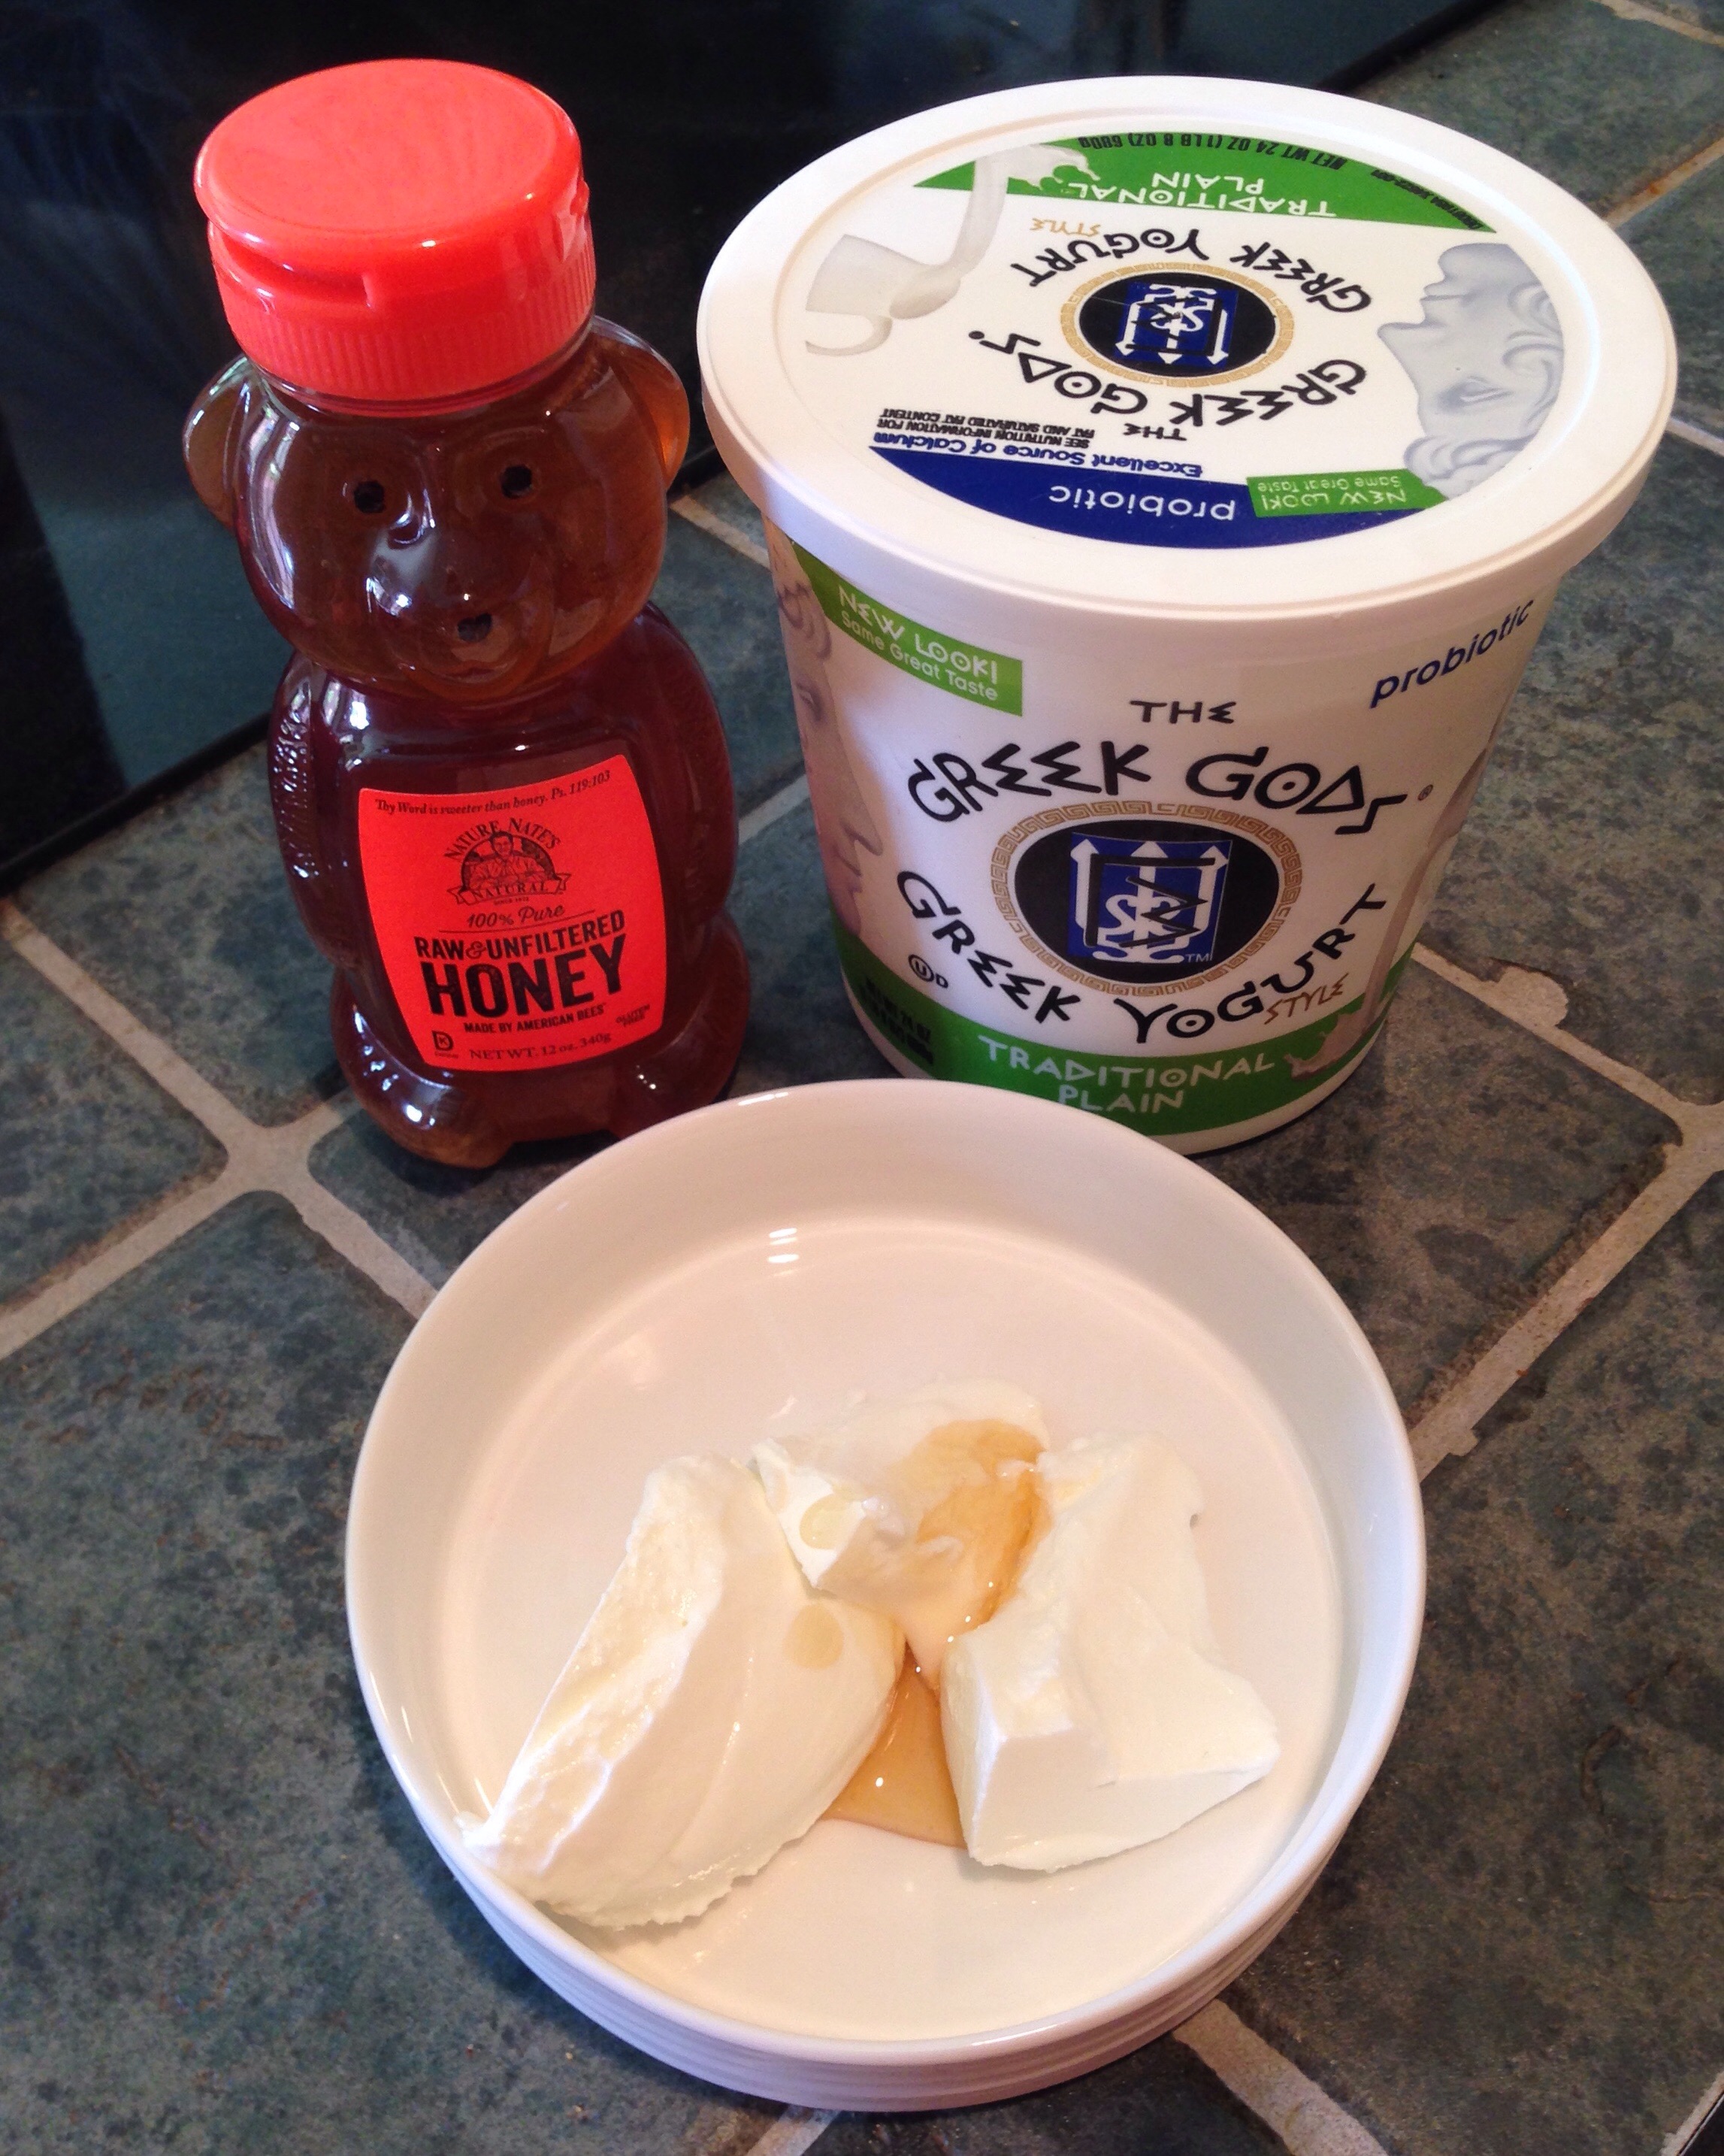


Ingredients:

2 tablespoons plain Greek yogurt (It’s important to use Greek yogurt because the consistency is much thicker than traditional yogurt.)

1 teaspoon raw, unfiltered honey

Directions: Mix two tablespoons of plain Greek yogurt and 1 teaspoon of raw, unfiltered honey into a small container. Mix the two together until the honey is evenly incorporated into the yogurt. Evenly spread the mixture onto your face using clean hands or spoon. Allow the mixture to set for 15-20 minutes and then rinse with lukewarm water, and pat dry.


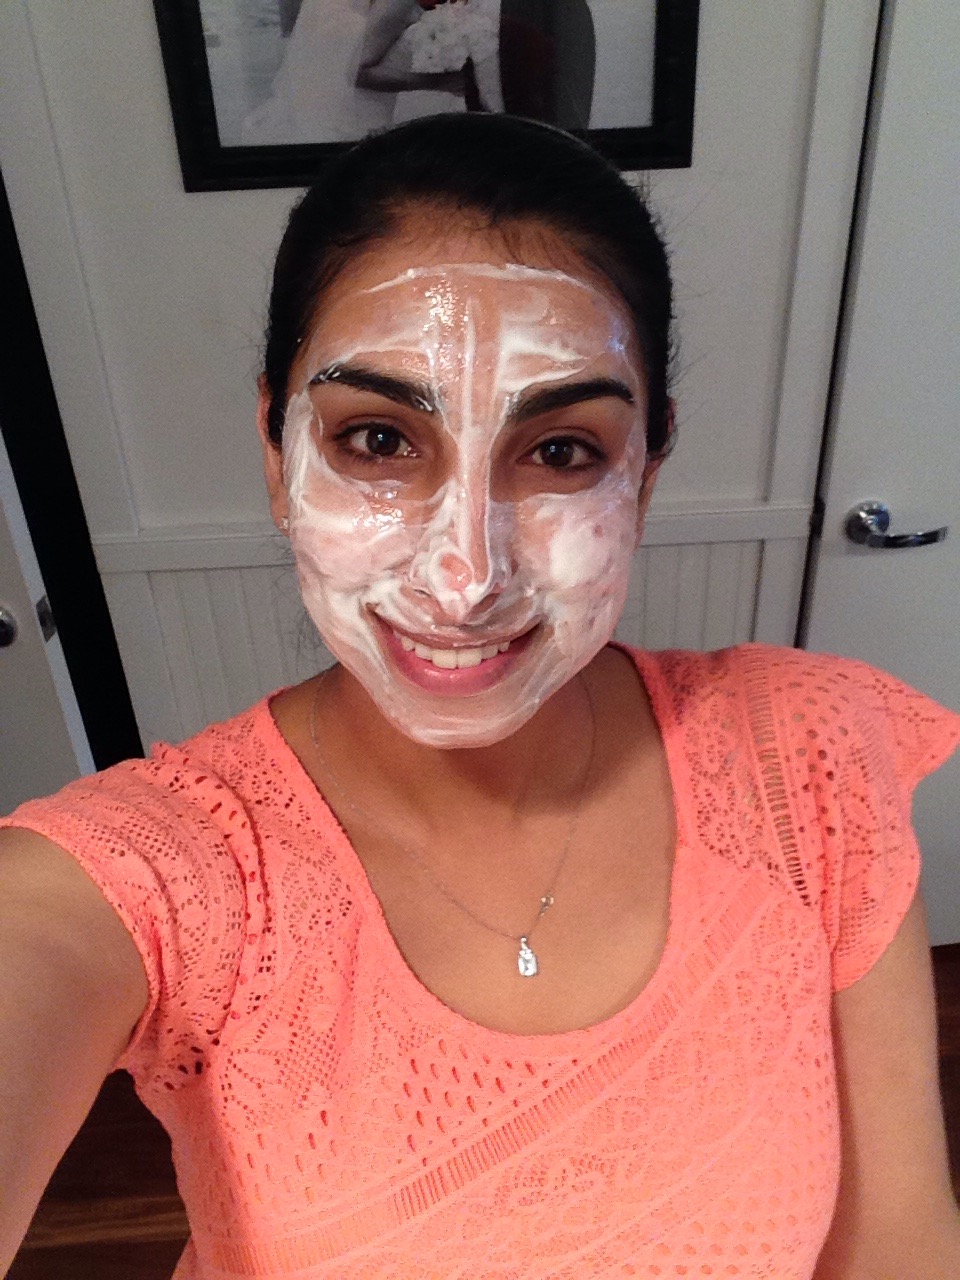
This mask is so natural, that you can snack on the leftovers ;). 


Immediately upon applying the yogurt honey mask to my face, my skin felt soothed. My face went from hot and itchy to cool and calm in seconds!

The probiotics in the yogurt work to calm and soften the skin, while the honey has natural antioxidant properties that help to soothe irritation. 


Once you’ve washed the mask off of your face, you may then apply hydrocortisone to further calm your irritated skin, if you feel the need, or just apply your favorite moisturizer. 

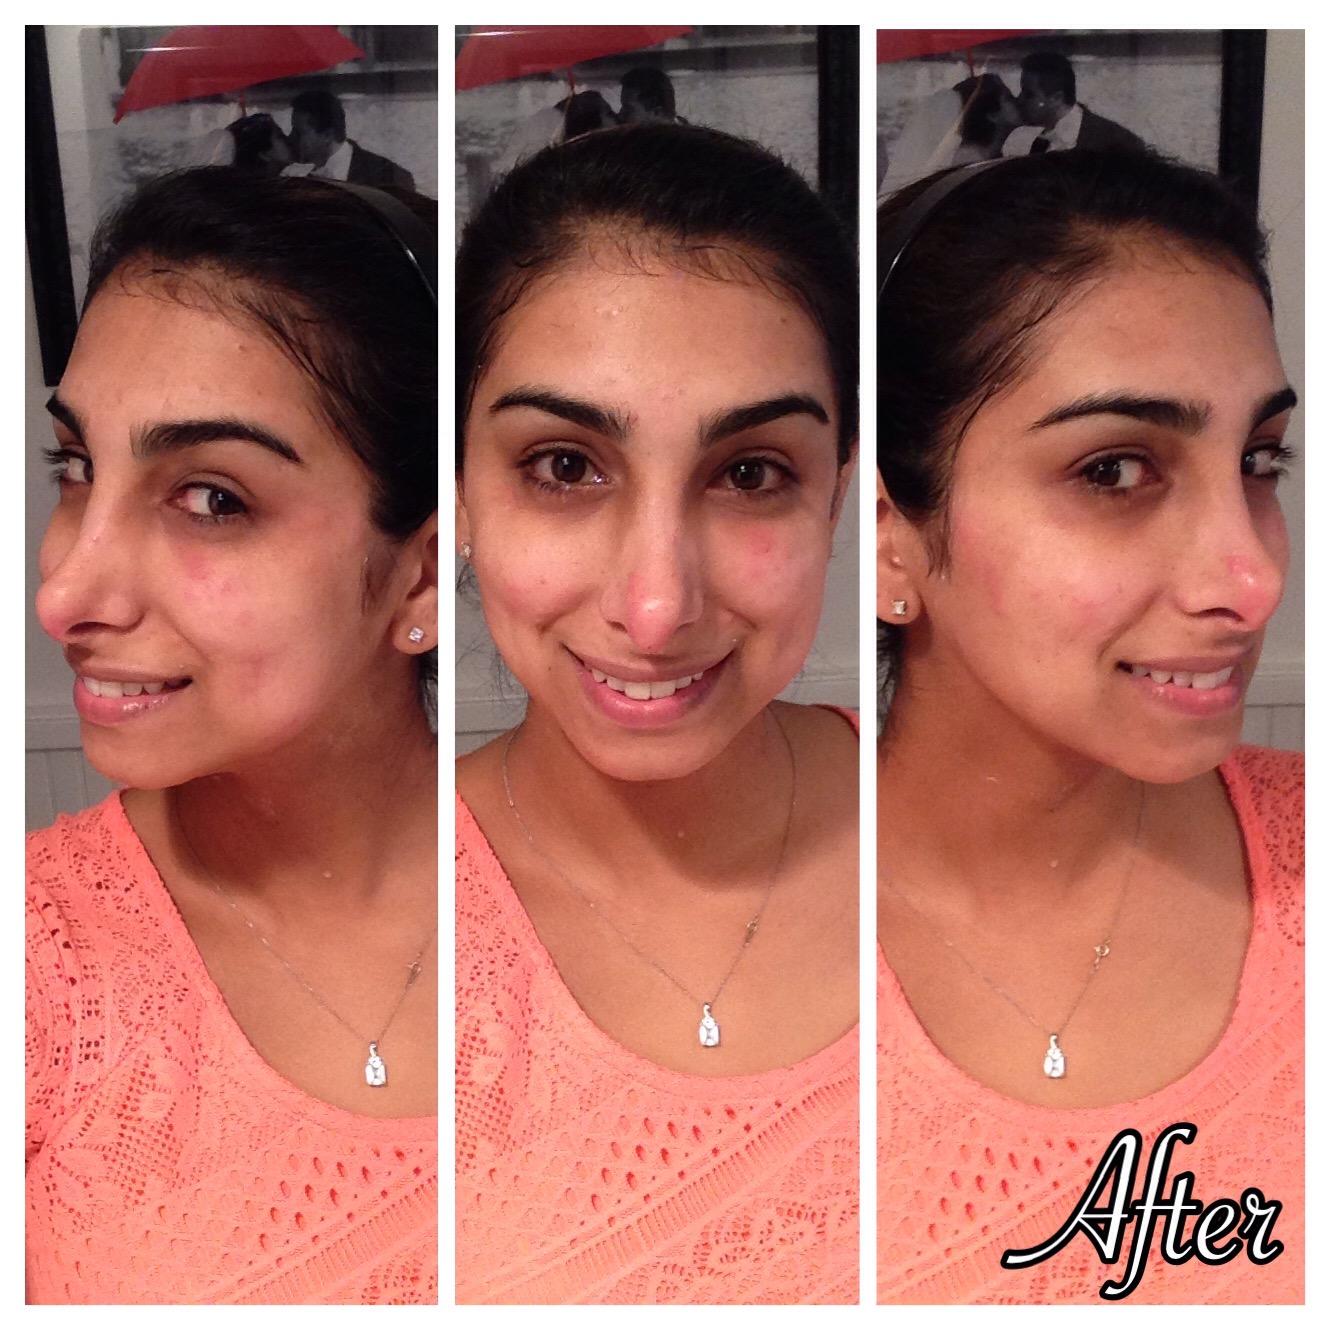
You can tell that my irritation has been calmed quite a bit, by the photos above. The bumps haven’t gone away completely, but they are much less bothersome. I will continue to apply this mask to my face twice a day for the next few days, or until the irritation is completely gone. I’m really hoping that this mask will aid me in getting rid of the hideous bumps all over my face! Wish me luck! 

What treatments work for your skin to get rid of irrational bumps?

2

Sticky Fingers & Bucket Storage Seats

Howdy!

I’ve been talking about this project with my husband for a year, and finally got it finished tonight… Bucket seats!

Although I’m creating them for my classroom, you could use them for a child’s room, play room, waiting room, any kind of room that needs some storage space.

What you’ll need:
– Buckets! You can purchase these from home improvement stores like Home Depot or Lowes or get them at a very discounted (or free) price from places like Shipley’s Donuts, Whataburger, or Firehouse Subs. Mine are dill pickle buckets from Whataburger 😉.

– Fabric! A 2×2 square is plenty with room to spare just in case. [$35]

– Foam! I used 2″ foam from Hobby Lobby [$3.99 each]

– All purpose spray adhesive! This is super sticky stuff. [$6.99]

– Cardboard! I used a trifold display board. [$3.99]

– Marker! You’ll use this to trace your circles onto your foam.

Directions:
– Trace and cut out a cardboard circle to fit inside the lid of your buckets.
20140816-211710-76630455.jpg

– Trace the cardboard circle onto each of your foam squares.
20140816-211552-76552356.jpg

20140816-211801-76681065.jpg

– Cut your circles out of your foam squares.

– Spray one side of a cardboard circle and one side of a foam circle with the spray adhesive, wait one minute, and stick them together.

– Spray the outer edge of the cardboard side of your circle with spray adhesive and place it adhesive side up on a fabric square.
20140816-211913-76753968.jpg

– Quickly and carefully pull the fabric toward the center of the circle and press down to stick it to the sticky cardboard surface. Do this until you’ve made it all the way around and your cardboard and foam now looks like a fabric covered cushion.
20140816-212008-76808787.jpg

– Apply spray adhesive to the inner circle of the bucket lid and the underside of the fabric covered cushion.

– After one minute, place the cushion onto the lid and apply pressure briefly.
20140816-212045-76845605.jpg

20140816-212142-76902457.jpg

– Repeat with each bucket until you have created the desired about of bucket seats :)!
20140816-212228-76948450.jpg

– If your buckets have writing, stamps, or safety warnings on the sides, use acetone and cotton balls to very easily remove them.
20140816-212303-76983863.jpg

20140816-212335-77015892.jpg
(If you look closely, you can just barely see the safety warning that was once on the side of my bucket in gold.)

– To take it a step further, ribbon can be used to jazz up the seats! I, honestly, don’t suggest using spray paint, because I feel like it would chip right away and be more of a nuisance than pretty.

All in all, this project cost more money and took more time than I had originally expected, but the end result is better than I thought it would be! I couldn’t have couldn’t have completed this project without the help of my sticky-fingered husband, who did all of the grunt work for me <3!

I hope you enjoyed this DIY and that it is useful to you :).

4

Teacher Toolbox

Wahoo!

I got a project done that I’ve really been wanting to complete for a while now… My teacher toolbox!

Materials:
-22 drawer Stack-On Toolbox [$19.97 Lowes]

-Labels printed on card stock [Free TPT]

-Scissors

-Double sided tape [$4.29]

Directions:
-Find or create your labels!

-Print your labels out on card stock and cut them out. I’ve read that some people laminate their labels, but I didn’t, and it worked beautifully!

-Apply double sided tape to the front of each label and place it inside the drawer. Press firmly to apply it in the proper place.

-Voila! You’re finished. Admire your work :).

The majority of my time for the project was spent filling in my labels on the computer and cutting out the labels. It’s a super simple project that will give your classroom (or office space) a refreshing vavavoom! 😀

20140814-223936-81576317.jpg

20140815-175144-64304984.jpg

1

Summer is Officially OVER!

For teachers, the summer comes to an end at the beginning of August, and you know what?

I kinda like it.

It feels good to be back in the classroom. Organizing, seat arranging, posting motivational words around the room.. I feel alive again! Like my life has a true purpose once more.

Although I’m extremely excited to be getting back into the “groove,” I’m also also feeling a little overwhelmed.

Goodbye to the many summer projects I was dying to complete that were never started.. Until we meet again next year!

I did get one thing done, though! Lol

I completed a bucket seat for my small group table. I’m going to use these bad boys to secretly store classroom supplies (Shh! Don’t tell! 😉)
20140811-190020-68420509.jpg

Although I’m back in my classroom and back in school for PDs, I still have a couple little projects I plan on completing before school gets started on the 25th, but we’ll see if they actually get done or not! I’m really hoping they do 😀!

I can’t wait to show y’all my classroom!

Live. Love. Learn.
Roxana